Hall or Nothing Productions Ltd: 2011

Tuesday, December 13, 2011

The Treacherous Dark of Khazad-dûm


Without any light they would have soon come to grief. There were not only many roads to choose from, there were also in many places holes and pitfalls, and dark wells beside the path in which their passing feet echoed. There were fissures and chasms in the walls and floor, and every now and then a crack would open right before their feet.
    –The Fellowship of the Ring, “A Journey in the Dark”
In The Fellowship of the Ring, J.R.R. Tolkien leads the Fellowship into the mines of Moria in the chapter titled A Journey in the Darkbut that chapter doesn’t begin in the mines and their suffocating darkness. It begins while the Fellowship trudges through the Misty Mountains, under the dim grey of the waning evening.
Tolkien works hard to establish the darkness–the very palpable and consuming darkness–of the mines of Moria, by establishing the presence and importance of light prior to the Fellowship’s first steps into the mines. The chapter contrasts the presence of light outside the mines with the truer, more profound darkness inside the mines. Even in the wintery night, the Fellowship finds light from flame, the fading sunlight, and the coming dawn. As readers, we’re made to understand that the darkness outside Moria comes and goes in cycles with the light. However, once they enter the mines, Tolkien carefully measures his mentions of light. Darkness abounds, but for almost the entire journey through Moria, only Gandalf’s staff sheds light. Even that light is dim.
The dark of Khazad-dûm
Why does this matter? In the Khazad-dûm Expansion for The Lord of the Rings: The Card Game, the darkness becomes a significant theme. Players wouldn’t feel like they were undertaking a trip through the perilous underground if the game were full of bright illustrations. Nor would you likely think much about the darkness if it weren’t reinforced.
Much as Tolkien used the words “dark” and “darkness” liberally through the second half of A Journey in the Dark, theKhazad-dûm design team decided it was important to reinforce the theme with Dark locations, Hazards, and other cards that would get you looking for any means to cast light ahead of your travels through the subterranean labyrinth.
Lead developer Lukas Litzsinger offers some insights on the coming darkness.
Developing the darkness
I knew that Khazad-dûm needed to portray the mines of Moria as a physical danger to the party. While it has its fair shares of enemies, even an empty Moria is a dangerous place. Crumbling passages and abandoned shafts create a treacherous landscape. Still, the most pressing design challenge was the darkness. How would this affect a party traveling through the mines? 
We made several attempts to give the darkness an active role in the game, such as with darkness tokens, but they all felt strange. They complicated the game more than they enhanced the theme, and we moved eventually to a more elegant solution. Dark locations are difficult to explore. This is both a theme and a mechanic, and you will discover thatDark locations have some of the highest quest point values in the game. Additionally, Dark locations get to be much more threatening as two or more build up in the staging area. They tend to boost each other’s threat as the darkness surrounds your party on all sides.
But in addition to darkness, we needed to represent light. So to represent the importance of light, we introduced aCave Torch (Khazad-dûm, 41) objective that the players use to place progress on these Dark locations.
However, the mines are filled with countless dangers, and while any light is a boon, managing the light is not always as simple as it first appears. While your Cave Torch is Burning Low (Khazad-dûm, 40) you’ll find the mines more threatening, especially the darkest of its Dark corners. Also, your Cave Torch can attract unwanted attention, and as you saw in an earlier preview, any enemies encountered have an uncanny ability to proliferate into more.
–Lukas Litzsinger, Khazad-dûm Expansion Lead Developer
Thanks, Lukas!
The dark mines of Moria hold many dangers, but some heroes push, undaunted, to search for Balin and his missing Dwarven colony. In our next preview, we’ll take a look at one of the doughty Dwarven heroes willing to brave a journey into the heart of Khazad-dûm!

Friday, December 09, 2011

Fantasy Quest Saga Tracker

Fantasy Quest Saga Tracker


This is an example Saga Tracker design for Fantasy Quest, this particular example is for the Assassinate Leader Saga.  The COMPLETE marker is a separate token placed over each element as it is completed.  For cooperative group quests every hero would have to complete that element at the same time, at the location designated by the saga to place the COMPLETE marker.

This would potentially help to track the progress of individual players' Sagas more easily, and help to flesh out group Sagas.

Thursday, December 08, 2011

The Watcher in the Water


Frodo felt something seize him by the ankle, and he fell with a cry. Bill the pony gave a wild neigh of fear, and turned tail and dashed away along the lakeside into the darkness. Sam leaped after him, and then hearing Frodo’s cry he ran back again, weeping and cursing. The others swung round and saw the waters of the lake seething, as if a host of snakes were swimming up from the southern end.
    –The Fellowship of the Ring
Elrond, the Elf Lord of Rivendell, is troubled by the great numbers of Orcs that plagued the heroes who escorted his daughter, Arwen Undómiel, across the Misty Mountains. He asks them to explore the mines of Moria, hoping they can determine if they are the source of the increased Orc activity, but before the heroes can explore Moria’s vast network of tunnels, they must first gain entrance…
Fantasy Flight Games is proud to announce The Watcher in the Water, the third Adventure Pack in the Dwarrowdelfcycle for The Lord of the Rings: The Card Game!
Dangers outside the Doors of Durin
Many players have already remarked upon the clever text of the Doors of Durin (The Watcher in the Water, 65) when the card was first revealed in the Dwarrowdelf announcement. Its flavorful recreation of the riddle that nearly stumped Gandalf and the other members of the Fellowship provides one of the highlights awaiting players with The Watcher in the Water.
Of course, fans of The Lord of the Rings have also eagerly awaited the dangers that lurk deep in the lake outside the Doors of Durin, and when it arrives, The Watcher in the Water will reward their anticipation. Seething masses of Tentaclessnake out of the lake to attack and ensnare those heroes who can’t find their way through the Doors of Durin. The tentacles strike swiftly, and heroes who can’t fight them off may find themselves Wrapped! (The Watcher in the Water, 76) and dragged beneath the surface of the waters. There’s no time to relax whileTentacles lash through the air; heroes who aren’t rescued in time will drown.
Into the heart of the Dwarrowdelf
The Watcher in the Water represents a turning point in the Dwarrowdelf cycle of Adventure Packs. Once they pass the Doors of Durin, the heroes of Middle-earth must explore the mines of Moria to find the cause of the increased Orc activity in the Misty Mountains. Yet they must first survive the perils of the fetid Swamps and the ferocious combat with the Watcher’s many Tentacles.
Look for this clever and action-packed Adventure Pack to hit the shelves in the first quarter of 2012!

Tuesday, November 29, 2011

Treading Boldly into the Mines of Khazad-dûm


Gimli aided Gandalf very little, except by his stout courage. At least he was not, as were most of the others, troubled by the mere darkness in itself.
    –The Fellowship of the Ring
The Khazad-dûm Expansion for The Lord of the Rings: The Card Game takes the game to a whole new level–the subterranean and labyrinthine tunnels of Moria! Within those vast, dark, Dwarven ruins lurk dangers terrible enough to cause even the stoutest adventurers to tremble. Your torch lights radiate a flickering light that spills onto grey stone walls, fading ever into impenetrable shadows. What is worse in that darkness–the endless, echoing silence beyond your footfalls, or a sudden drip or the clatter of falling rocks?
A journey in the dark
Khazad-dûm introduces a number of new Underground and Dark locations. While these new locations immerse you in your heroes’ subterranean journeys through the mines of Moria, they introduce a number of subtle mechanics. InThe Lord of the Rings: The Card Game, each location has a Threat value that represents the potential dangers awaiting your fellowship. Only by thoroughly exploring a location can you be assured it no longer shelters hidden enemies plotting their ambush or that it doesn’t hold some dark secret you may fail to uncover. In the dark of Moria, locations like Branching Paths (Khazad-dûm, 36) are more ominous than ever, and the darker your journeys, the more your fellowship will feel the darkness surrounding them on all sides, laden with hidden threats.
As the game continues to mature and evolve, the design team has found new ways to work with locations, and Khazad-dûm introduces new ways in which locations interact with each other and with other encounter cards. Since the game’s inception, fellowships have had to work to make sure hidden threats in unexplored locations couldn’t mount against them unchecked. The travel phase remains as important as ever; the locations in Khazad-dûm generally pose higher threats to your fellowship and require greater effort to explore than the locations from the Core Set and Shadows of Mirkwood cycle of Adventure Packs. Still, as one might expect travel through the ancient Dwarven realm’s network of dark tunnels to prove difficult and be laden with tremendous threats, one might also expect the Dwarves to be prepared to deal with these threats…
Untroubled by darkness
The Dwarves are miners, metal-smiths, and no strangers to the dark. The darkness troubles them little, and Khazad-dûm provides Dwarf characters with a number of means of progressing more swiftly through the shadows, Underground, and Dark recesses of Moria. While many players have noted how masterfully the Rohirrim excel at traveling and questing aboveground in the Shadows of Mirkwood, the Dwarves will soon take the lead undeground with cards like Untroubled by Darkness (Khazad-dûm, 10) and Ancestral Knowledge (Khazad-dûm, 12).
The Shadows of Mirkwood cycle saw the development of a number of strong deck-building themes, including Rohanand Eagles decks. In the mines of Moria, the remnants of ancient Dwarf culture surrounds your heroes at every step, and Khazad-dûm provides fans many exciting new opportunities to bring these stalwart warriors to life, including two new Dwarf heroes that let you play Dwarves of any sphere of influence.
Look for the Khazad-dûm Expansion to add new adventure and peril to your adventures in Middle-earth. This deluxe expansion for The Lord of the Rings: The Card Game is coming soon!

Monday, November 14, 2011

Legend of Drizzt: Hero Levelling cards for campaign play


Legend of Drizzt: Hero Levelling cards for campaign play

The following are the Levelling Hero cards for the Heroes of Legend of Drizzt.  They are for use with the Dungeons and Dragons Adventures System campaign rules which can be found here:


Thanks to Malone76 and GeckoTH for the templates!

Friday, November 11, 2011

Legend of Drizzt, Artemis and Jarlaxle vs Count Strahd of Castle Ravenloft


Drizzt, Artemis and Jarlaxle vs Count Strahd


And since I can't find an image of Drizzt Vs. Strahd, here's an image of Drizzt Vs. Red Sonja instead:


From the moment LoD was announced I always liked the idea of taking Drizzt Do’Urden up against Count Strahd in his Castle to see what happens.  For our group the setting of Castle Ravenloft is always the most interesting and exciting to return to.  Thematically it wins out over Wrath of Ashardalon and Legend of Drizzt, and in terms of difficulty you have ridiculously tough encounters that really paste the heroes over time, combined with standard monsters like the Wraith which casually spit out THREE damage at a time.  Much more intimidating than WOA or LOD.

Drizzt and Artemis were quickly chosen as heroes by me fellow adventuring buddies, and picking through the leftovers I thought I’d give Jarlaxle a try.  So, you know, don’t go looking for any narrative justification of our hero choices here.

It’s worth mentioning that we always use the Treasure Token rules from Wrath of Ashardalon which can seriously handicap your heroes, especially in the early adventures.  Basically instead of drawing a normal treasure card you usually end up drawing a measly 100 gold when you kill a monster (always draw treasure cards for beating villains though).  When you do finally draw a treasure, even if it’s just a Potion of Healing, you end up dancing a little jig at the prospect.  After each adventure you draw three treasures and may buy one with your haul of gold pieces.  Usually this results in the untimely murder of all the heroes after one or two adventures.  But if you do survive you can start building up your hero over the adventures, which is really satisfying.

Our favourite mini campaign is the triptych of the ‘Search for the Sunsword’ Adventure followed by the ‘Hunt for Strahd Parts 1 & 2’.  Search for the Sunsword eases you in nicely and you also get a cool boost – the Sunsword - when you beat it for taking on the next two adventures as the difficulty quickly spikes upwards.  Usually.

Last night we staggered into the crypts looking for Sergei’s Tomb and the fabled Sunsword.  Or half of it anyway.  For some reason we already had half of the sword, and for another reason we didn’t know who had the half that we already had...  had.  In any case spirits were high as we laughed about our mighty powers and Drizzt called in Guen the friendly panther straight away.  We shouted down the passageways at any hidden monsters, goading and verbally abusing the poor, restless dead as they awoke from their coffins and meandered towards us.

Things started off okay, as they always do, a little bit of damage here and there from monsters and nasty encounters with pseudopods and angry butlers and some gone off food which had become sentient.  Artemis went exploring and then throwing the revealed monsters for miles so that they’d never bother us – particularly useful against Gargoyles which he can place back on the empty start tile where they just resume their stone forms and sit there.

Then Drizzt decided to start rolling low, like really low.  And before we realised it, the monsters started stacking up and duplicate monsters came pouring out of the endless tunnels.  As the duplicate monsters activated, their monster friends whom Artemis had thrown back to the start tile began to catch up and before long we were running around fighting for our lives, wishing we’d brought a cleric along for some healing, cursing the stupid treasure token rules and getting generally pummelled and pinballed between monsters all over the dungeon.

Soon enough the 4XP Grey Hag (sitting inside the card sleeve of a Wraith) reared her ugly head from the monster deck and started moaning and throwing lightning at us, Drizzt got immobilised on her tile by a trap – but crucially not adjacent to her, as Jarlaxle I had spent every last utlity, daily and treasure I had, and Guen got taken out by a malicious fireball from a Blazing Squad (Skeleton).

Artemis was faring a little better and managed to level up after throwing a natural 20, then following it with two more natural 20s just to show off, but his misplaced monsters had all but caught up and after Drizzt hit the dirt we had to spend a healing surge.  This caused a Young Vampire Villain to appear and start waffling at us with theatrical gesticulations and amateur dramatics level direlogue about how we were powerful, but not that powerful, etc.

Rolling his eyes at the Vampire’s theatrics, and with just a handful of HP left Artemis found Sergei’s Crypt and grabbed the Sunsword.  Quickly realising it would be more effective in Drizzt’s multi-attacking hands he begrudgingly handed it over.  And then began the race back to the stairway where a frozen Gargoyle sat, waiting to attack.

Our feet beating stone we legged it back through the dungeon, some of us more quickly than others – hello Speed 7 Drizzt.  Piling onto the Gargoyle we took him down with a flurry of blows and then formed up on the stairway together.  A wandering Ghoul and some nasty friends (baffled discussion arose here: spider is ‘vermin’, but rat swarm is ‘animal’?) charged us at the stairway whilst the Young Vampire could be heard mincing and waltzing through the dungeon somewhere in the near distance.

We fended off the monsters’ attacks and Drizzt’s turn came around, since he was stood on the stairway with the Sunsword we were able to dash up the stairs and back out into the safety of daylight – a victory!

Our slim pickings had procured us a few hundred gold and we nipped back to Barovia for supplies from the moody townsfolk.

“One single Healing Potion?  That’s all we can afford?” spat Jarlaxle. 
“Be thankful we can afford even that, thanks to your pitiful efforts,” snarled Artemis.
“Can’t we all just get along, guys?  Group hug?” beamed Drizzt.

Counting our blessings that we even finished the adventure, we prepped ourselves for part one of the showdown, dubious of the fact that we’d have to take down Strahd’s Villain henchmen before we can even approach the man himself.  Considering we’d literally just run away from a weedy little Young Vampire and barely survived things were looking grim.  Artemis was level 2 and had his precious extra Daily power, but we were actually lower on treasures than we were before the first adventure.

Holding our breaths we descended once again into the crypts...

Relatively more cautious in our approach we sneaked about, concentrating on trying to take monsters out where possible instead of blindly exploring ahead.  A run of black tiles saw us fetch up many of the quest items quickly (Wooden Stakes, Silver Daggers, etc.) but also gave us a nasty run of encounters.  Constantly fighting enemies to keep our experience pile stocked for encounter cancelling we stumbled into the Arcane Circle where Strahd’s henchman awaited.

The Zombie Dragon.  We decided to stop exploring until we could take him out.  Artemis, having the most HP and feeling the most confident whilst boasting of his Parry and Strike power, went toe to toe with Strahd’s pet.  Meanwhile Drizzt, Guen and Jarlaxle circled the beast, taking potshots and collecting the remaining quest items, including the currently useless Dimensional Shackles (although in a distant room somewhere, Klak began to cack himself).

Throwing a hissy fit at the sniping heroes, the Zombie Dragon snarled and took a swipe at a passing Guen and sent her back to her home plane of existence.

“Nooo!” squeaked Drizzt.  Despite wanting to save our dailies for Strahd we instead decided to run in and blow them all on the Dragon.  Clouds of Darkness engulfed the poor thing as Drizzt used Twin Strikes, Artemis duelled it with his magic longsword, and then Jarlaxle launched a bracer of daggers at the beast, spectacularly missing it by miles.  Eventually the undead monstrosity went down and we tottered away from its spasm-throwing body.

Collecting our breath, with Drizzt and Jarl on low HP, Artemis explored the next tile only to discover the Secret Stairway where Strahd awaited.  A string of events summoned a human cultist to his side (we swap the cultists from WOA for the Kobolds of CR) and the bloody unwelcome Grey Hag appeared again too.

With resources low and HP lower we set about alternately attacking the Count and his allies.  With no powers left my attacks against him were going to be pretty ineffectual on account of the Vampire’s healing ability so I took aim at his cultist minion and launched a dagger into its cowled head.  As luck would have it I drew a Treasure Token with ‘Treasure’ on it, which meant I could actually draw a treasure card this time.  After my little “yay, a treasure” jig I performed an even bigger jig when the Dragontooth Pick (or Dragon Toothpick) turned up: +1 to hit and +1 damage if you roll 19+.

Drizzt and Artemis laid into Strahd and started well enough, especially since we only needed to get him down to 5HP before he turns into mist and we win this scenario (you only get to properly ‘kill’ him in part 2).  But our XP had dried up and the Crushing Walls trap came into effect followed by another series of ingenious traps.

Sidenote: every time we fight Strahd we get hammered by Traps in the final confrontation.  Every time.  I’m sure the encounter deck knows when we find him.  Anyway...

Dodging sliding walls and crossbow bolts we continued to fight the good fight and Artemis with his higher fancy shmancy Level 2 Hit Points drew the Count’s attention for the most part whilst Jarl and Drizzt chipped away at him.  After a few misses the Count eventually got a grip on Artemis and began to drain his blood.  Soon he was no longer the hero with the highest HP which meant the Count turned his attention to Jarl and Drizzt.  Activating after every one of our turns meant that the damage we dealt him started to heal when he struck back.

Soon we were fighting a losing battle, and when the Passage of Time encounter card turned up we all dropped down to 1 or 2 Hit Points each.  Grinning through bloodstained teeth the Count redoubled his attacks and took Drizzt out.  Jarlaxle attacked back valiantly and then the Count took him out too, before turning on a suddenly lonely Artemis.

We took a pause in the action to appraise the situation and allow our pulsing heart rates to subside a little.  We rolled up our sleeves, wiped our brows and pressed on.

Artemis attacked Strahd and hit, Strahd was down to 7HP (effectively 2HP because we only needed to get him down to 5).

Strahd and the Hag attacked back and brought Artemis down to 1HP, whilst healing Strahd back up to an effective 3HP.

Jarlaxle spent a surge and stood up, swung for Strahd and rolled a natural 1.  Strahd fought back along with a nasty encounter and Jarlaxle went down to 1HP.  Strahd now on 4HP.

Drizzt spent the last surge and stood up, swung for Strahd twice and hit him once with the Sunsword, bringing him back down to 2HP.  Strahd and the Hag and encounter fought back and Drizzt went down – on Drizzt’s next turn we would now lose.

Artemis attacked Strahd and inflicted 1 damage.  Strahd, Jarl and Artemis stood on (effectively) one Hit Point each.  Strahd attacked Artemis and missed.

All eyes on Jarlaxle.

Strahd has a ridiculous 19AC.  Wielding the Toothpick I’d need an 11 to win the game.  If I failed it would be Drizzt’s turn and we’d lose the game instantly.

50/50 chance (about 25/75 when you factor in my terrible dice rolling ’skills’).

Real life Drizzt decided at that very second he needed to go to the bathroom.

Artemis and I sat in silence and waited for his return.

Drizzt came back.

Sat down.

You could hear a pin drop.

So I rolled.

And this song has been stuck in my head ever since:


The Hunt for Strahd Part 2 to follow next week....

Tuesday, November 08, 2011

Plundering the Riches of Khazad-dûm


From the original article here:


“We have done well,” he said. “But in metal-work we cannot rival our fathers, many of whose secrets are lost. We make good armour and keen swords, but we cannot again make mail or blade to match those that were made before the dragon came.”
   –Glóin, The Fellowship of the Ring
Dwarves speak of Moria with longing and with dread. Therein lie treasures undreamt and horrors both ancient and powerful. For generations, the Dwarves whispered tales of its wealth, but none dared pass through its doors… until Balin. Taking with him two other members from Thorin’s renowned companions, Balin traveled to Khazad-dûm, passed its doors, and began new works there. At first, their works fared well, and they reported to their kindred outside the Misty Mountains.
When the Dwarves of the northeast no longer receive word from Balin, they call upon some of Middle-earth’s greatest heroes to look for the Dwarf and his fledgling colony. As your heroes explore Khazad-dûm, the first deluxe expansion for The Lord of the Rings: The Card Game, they will discover both the realm’s abandoned riches and its hidden perils.
Riches worthy of song
Flush with 165 new cards (including 3 copies of each new player card), Khazad-dûm contains a wealth of new player cards, enemies, treachery cards, and locations. Its nine encounter sets create encounter decks for its three new scenarios and form the backbone of the upcoming Dwarrowdelf cycle of Adventure Packs. While most of the locations from these encounter sets work together to immerse you in the dark and dangerous passageways that traverse Moria, these new locations also expose new creative ground within the game. When your heroes explore a Plundered Armoury (Khazad-dûm, 34), you have the chance to play a Weapon or Armor attachment from your hand for free. These will be welcome additions to your fellowship as enemies press in upon you from all sides, and the ability to equip your hero with an expensive attachment like Citadel Plate (Core Set, 40) may prove the decisive edge between death and the successful completion of your quest.
Another treasure from Khazad-dûm appears as a player card. Narvi’s Belt (Khazad-dûm, 3) is a fantastic, unique two-cost attachment for the Leadership sphere that will soon prove indispensable in new deck builds, joining the ranks of Steward of Gondor (Core Set, 26) and Celebrían’s Stone (Core Set, 27) as the keystones of different strategies. While the Shadows of Mirkwood cycle introduces Songs that grant your heroes resource icons for each of the four spheres of influence, Narvi’s Belt provides a more efficient means of granting alternate resource icons in any deck with a Dwarfcharacter. Resource versatility results in flexible deck-building, and you may be able to better focus your heroes toward their strengths even as you draw upon the best supporting cards from all four spheres of influence to aid them on their quest.
Uncover the hidden perils of Khazad-dûm
The doors of Khazad-dûm will open soon. In the meantime, keep your eyes peeled for future previews in which we risk a little more light down the mines of Moria…

Friday, November 04, 2011

Second Dwarrowdelf Adventure Pack for The Lord of the Rings


Frodo saw her whom few mortals had yet seen; Arwen, daughter of Elrond, in whom it was said that the likeness of Lúthien had come on earth again; and she was called Undómiel, for she was the Evenstar of her people. Long she had been in the land of her mother’s kin, in Lórien beyond the mountains, and was but lately returned to Rivendell to her father’s house.
    –J.R.R. Tolkien, The Fellowship of the Ring
Fantasy Flight Games is proud to announce the upcoming release of Road to Rivendell, the second thrilling chapter in the Dwarrowdelf cycle of Adventure Packs for The Lord of the Rings: The Card Game!
Having traversed the freezing snows and treacherous mountain pass of The Redhorn Gate, the heroes of Middle-earth continue their winding journey through the hills west of the Misty Mountains. But the way is long and perilous, and dangers await those sent to escort Arwen Undómiel along the Road to Rivendell.
Ambush!
Road to Rivendell introduces a deadly new encounter mechanic, Ambush, that changes the way you encounter enemies and forces the first player to be wary as your heroes tread their way westward and northward through the hills west of the Misty Mountains. Each time an enemy with the Ambush keyword is revealed from the encounter deck, each player makes an immediate engagement check with it, starting with the first player. Enemies with Ambush quickly pounce on players who fail to keep their threat low, and the first player, especially, has reason to tread lightly. In a four-player game, it’s possible to reveal four enemies and watch with terror as your heroes stumble into the middle of their ambush.
Not only does this exciting new mechanic change the way players have to consider who to commit to the Quest and who to leave ready for defense, it makes the Forced effects of some of the new enemies all the nastier. For example, a band of Orc Raiders (Road to Rivendell, 50) forces the discard of two attachments whenever they engage with a player. Woe to the player relying upon a single Citadel Plate (Core Set, 40) to provide Gimli (Core Set, 4) enough additional Hit Points to survive his wounds! Even when you have the additional attachments to discard, you find your options slipping away, and Rivendell seems farther and farther away…
The aid of the Elves
As your fellowship nears the Last Homely House west of the Mountains, Road to Rivendell also presents new support for Elven characters.
The finely-crafted Rivendell Blade (Road to Rivendell, 31) plays on either a hero or an ally, but only if the character is a Noldor or Silvan Elf. As fearsome enemies stage ambushes to waylay your party, each of your Elves armed with a Rivendell Blade can strike true to make short work of their foes, and your party will need to cut through the opposition quickly in order to escort Arwen safely to her father’s home.
Those heroes who start down the Road to Rivendell must be ever on their guard, for their journey is long and fraught with dangers. Begin your journey when Road to Rivendell releases in the first quarter of 2012!
Note: A copy of The Lord of the Rings: The Card Game Core Set and theKhazad-dûm Expansion are required to play the scenario included in this Adventure Pack.

Thursday, November 03, 2011

Dungeons & Dragons Castle Ravenloft Adventure Database | BoardGameGeek

For those of you not already on BGG (and you should be!) this is a great resource for finding and rating official and unofficial scenarios for the D&D games. Plus one more vote and my own Kobold Wars adventure will enter the rankings too... ;)

Dungeons & Dragons Castle Ravenloft Adventure Database | BoardGameGeek:


'via Blog this'


Monday, October 31, 2011

Lords of Waterdeep Board Game


Lords of Waterdeep Board Game


Some info concealed in this blog here:

Greyhawkery: Gencon: D&D Product Seminar:

'via Blog this'

I'd post the link to the source blog but it's a bit cluttered...

Monday, October 24, 2011

The Lord of the Rings: LCG, Tricks and Taunts in The Dead Marshes

Fantasy Flight Games [News] - Tricks and Taunts in The Dead Marshes:


'via Blog this'


“His Eye is now straining towards us, blind almost to all else that is moving. So we must keep it. Therein lies all our hope. This, then, is my counsel. We have not the Ring. In wisdom or great folly it has been sent away to be destroyed, lest it destroy us. Without it we cannot by force defeat his force. But we must at all costs keep his Eye from his true peril. We cannot achieve victory by arms, but by arms we can give the Ring-bearer his only chance, frail though it be.”
–Gandalf, Return of the King

There aren’t many instances in J.R.R. Tolkien’s The Lord of the Rings of heroes taunting their foes to distract them or draw their assaults away from weaker allies. More often, the heroes are hard pressed to survive by any means, finding themselves in situations too dark and grim to make jibes. Still, as The Dead Marshes introduces the Song of Mocking(The Dead Marshes, 99) to The Lord of the Rings: The Card Game we find precedent for larger ruses in Tolkien’s works. Most notably, based on Gandalf’s counsel in Minas Tirith, the Lords of Gondor and Rohan led an army of seven thousand to the Black Gates of Mordor, where they were prepared to be defeated by Sauron’s forces, merely to distract his attention long enough to let the Ring slip beneath his gaze on its route to Mount Doom.
Lured into danger
Song of Mocking doesn’t make so historic an impact in the world of Middle-earth, but it can be put to good use in the right deck. Because the flavor quotes The Hobbit and cites Bilbo, players may be led to consider playing it on Bilbo Baggins(The Hunt for Gollum, 1), but Bilbo’s low hit points make him a poor candidate for the attachment. Instead, the attachment’s sphere of influence provides the first suggestion for one of its better targets. You need Tactics resources to play Song of Mocking, and even though heroes can now gain the Tactics icon via Song of Battle (The Dead Marshes, 104) the easiest way to gain Tactics resources is still playing a Tactics hero… such as Gimli (Core Set, 4), who benefits from each point of damage redirected to him.
Players have often tempted fate by choosing to have Gimli defend massive attacks, hoping that he’d survive the enemy’s strike, only to become stronger for his eventual counterattack. Accordingly, Gimli has often fallen in games when the Shadow cards turned against him. Song of Mocking offers an alternate strategy to launch an angry Gimli into battle. Players can defend with Bilbo Baggins or Denethor (Core Set, 10), heroes with reasonably high Defense strength, but low hit points. Instead of placing the wounds on them, they can redirect those wounds to Gimli who, because he didn’t need to defend to survive the attack, can counterattack immediately afterward.
To ensure the damage doesn’t spill over Gimli’s available hit points, players can take advantage of the Lore icon both Bilbo Baggins and Denethor share to play A Burning Brand (Conflict at the Carrock, 33), rendering Shadow effects against them harmless, and guaranteeing that your combat goes according to plan.
Profit from mockery
While the ability to use Song of Mocking to more effectively combine Denethor’s defense and Gimli’s attack may increase the number of Lore / Tactics decks, Song of Mocking can also power the engine formed by Glóin (Core Set, 3) andSelf Preservation (Core Set, 72). Players have long harnessed the synergy between these cards, defending enemies with Glóin to gain resources for each wound he takes, then healing wounds with Self Preservation to repeat the actions again in subsequent turns.
The problem, as it is, with this strategy is that Glóin isn’t particularly suited to defense, with only one Defense strength and four hit points. His two Willpower makes him better for questing, but when he performs a Song of Mocking, Glóin can both quest and profit by drawing damage away from another hero.
While the Tactics sphere isn’t immediately as powerful as the other spheres in truly well-rounded decks, it features some of the most powerful tricks in the game. Along with Feint (Core Set, 34) and Quick Strike (Core Set, 35), Song of Mocking allows Tactics players to further stamp their mastery of combat upon the game.
Look for Song of Mocking, Song of Battle, and a new one-cost Eagle ally to greatly increase deckbuilding options for Tactics players with the upcoming release ofThe Dead Marshes.

DnD Adventure System - AI Tactics Cards

Following the Tactics cards from Gears of War, here's a rough example of how they could be implemented in the D&D Adventure System:


Legend of Drizzt: Hero Levelling cards for campaign play

For use with the D&D Adventures System campaign rules:


Thanks to Malone76 and GeckoTH for the templates!

Friday, October 21, 2011

Fantasy Quest - Game Files - The Tavern of the Game

The resolution to freouslc's epic Fantasy Quest adventure, told with story and photos has finally landed and can be found over at the Tavern here:

Fantasy Quest - Game Files - The Tavern of the Game:

'via Blog this'

Epic stuff indeed!

Legend of Drizzt – 2 player session report


Unable to wait for friends to play with I broke open Legend of Drizzt and played about ten solo games after picking it up from my FLGS a couple of days ago.  Winning every game led me to believe that the heroes are a tad stronger in this title than in Castle Ravenloft or Wrath of Ashardalon (and they are).

So when Mmzomba dropped round last night for a gaming session with his brand new copy of Game of Thrones: LCG (boy, are our fingers on the pulse or what?) we contemplated for about 3 seconds which title to play.  Our third player didn’t turn up because he had some kind of ‘date’ with his ‘girlfriend’ - poor lad needs to sort his priorities out.  So we opted for a night of intensive 2-player dungeoneering over political wrangling, intriguing and power token challenging.  Or whatever.  (Still want to try GOT: LCG btw, TV show rocked, made me buy the book, read the prologue, remembered how I never have the time to read books anymore...)

Since Mmzomba plumped for Artemis Entreri we skipped the adventure where Artemis is the baddie and started with the Shimmergloom adventure, i.e.  ‘Find the shadow dragon Shimmergloom, rip his heart out and then show it to him as he dies’ or something along those lines.  If he was going to play the coolest character from the books then I’d obviously have to play the second coolest...

Mmzomba began to grow dubious early on when in my first turn as Drizzt I summoned his pet panther Gwuenwhueevhuarrrarrrer, went into Last Blood Stance drew a monster, jumped forward and chopped said monster into bits and grabbed the treasure spilling from its guts, then had Guen come over and eat the leftovers.

Artemis wandered the caverns, revealing monsters and using his batshit crazy ability to place them on any tile, whilst Drizzt jumped around going “hi-YAH!” and murdering the poor things.  When I finally missed two attack rolls in a row against a measly goblin Mmzomba’s eyes lit up at the prospect of being able to finally attack something.  But Guen jumped over and swallowed the cowering little archer in one gulp.

By the time we reached the Dark Chasm goal tile we’d stocked up on treasures, healed the few injuries we’d taken, Artemis had killed a couple of beasties too (by deliberately placing them away from Drizzt so he could get there first), and we’d both commented on how the new tiles and encounters had great little evocative effects on them.  Volcanic vents igniting lava, narrow tunnels suffocating movement, a hidden tunnel providing short cuts, a secret cave giving reprieve from encounters, a campsite offering temporary safety.  We also learnt to get rid of Lolth’s Curses as soon as possible.  Said Curses only affect you once each time in solo play, but with more than one player they can rapidly start to dish out the damage if you don’t manage them effectively.

Even so, as Drizzt and Mr Entreri sauntered into Shimmergloom’s lair there was only one creature in the Underdark quaking with fear.  The poor dragon put up a meagre defence as we leapt in and tore him a new one.  With two untouched healing surges and maybe 4 HP damage between us it was a relatively unchallenged victory.

After discussing possibly house-ruling Drizzt to one attack per turn we quickly decided to put Mr D’O and Mr E to one side for the time being.  Instead we took Bruenor and Catti-Brie on the quest to save Wulfgar from Errtu the big nasty Balrog who isn’t really a Balrog because his sword is made of lightning not fire, see?

This was a much closer game.  After laughing confidently about our incredible hero powers we ventured forth into the dungeon only to have a Feral Troll appear and start wind-milling its gigantic arms at us.  Catti-Brie ran off and continued exploring whilst Bruenor was beaten to the floor by a rather exciting NINE HP of damage from 3 consecutive Troll attacks.  Spitting a tooth and wiping his mouth, Bruenor got back to his feet and snarled at the troll, “That all you got?”

Then, in a flurry of blows and curses Bruenor brought the troll to its knees before sending its head whirling into the Underdark.  There’s basically no point attacking a troll unless you’re going to take it down fast.  Troll regeneration in LoD is nasty.  And in a two player game they activate every turn, like a villain, so you really have to take it down if one appears.  If two appear together, well, time to go home really.

We ploughed on and when the “Secret Cave: Spa and Hotel Retreat TM” appeared (which stops you from having encounters whilst you’re on it) we made good use of it, Catti-Brie even discovering a Hidden Tunnel that would lead us there and back when we needed it.  As Bruenor finally found the Crystal Shard objective tile Catti was well behind and still discovering tiles but our HP was running low.  Bruenor’s healing Dwarven Ale had long ago been consumed, but a lucky encounter with some moaning spirits had provided him with a Blinding pair of Bracers which allowed him an extra attack each turn.

Errtu the bigass demon appeared, snarled and stalked towards Bruenor swinging its sword and whip.  Catti meanwhile opened up a narrow corridor from which Dinin the Drider emerged.  Quickly realising she was not remotely equipped to tackle the 3HP Drider, Catti ran away and hid in the Secret Cave which meant that the Drider scuttled over at a pace towards the already beleaguered Bruenor.

Realising I was going to be attacked multiple times by two of the toughest enemies I had to decide who to take down first.  Errtu was blocking the path towards Wulfgar, who was trapped in the crystal prison, so I couldn’t free him as an ally and get his help.  But the Drider would keep chipping away at me until I took him and Errtu down.  So I turned my attention to Dinin the Drider.  With a mighty axe swing, a nifty application of one of Bruenor’s Power Strike tokens (+1 damage) and a desperate Headbutt, Dinin the Drider collapsed into a heap of wiggling spider legs.  His treasure was the Girdle/Belt of Storm Giant Strength (+2 damage on adjacent hits).  This is LoD’s ‘Holy Avenger’ or ‘Captain America Shield’.  Awesome.

Sprinting away and strapping on his new belt Bruenor turned to face the demon.  Catti considered exploring because she didn’t want to feel left out, but was also too far away to help battle the demon.  So she revealed a new tile along with a Goblin Archer, took a shot at him with her bow, missed, and got taken down in a hail of goblin arrows.

Errtu stalked after Bruenor and bellowed some curses about Drizzt, who incidentally wasn’t there anyway.  Psyching himself up Bruenor charged the demon and attacked repeatedly.  With a natural 20 level up, using up his remaining power tokens, and by applying the power of the Giant’s Belt and Blinding Bracers, Bruenor started hacking big chunks out of the demon.  The demon struck back repeatedly but Brunoer held.  Catti spent a healing surge to get back up after the goblin’s attacks and shot the little critter through the eyes.

Then Bruenor took his axe in both hands and leapt at Errtu.  With a mighty swing the dwarf’s axe put paid to Errtu’s retirement plans and the demon fell to his knees, looking the dwarf in the eyes.  As a final insult Bruenor stepped forward and head-butted Errtu in the face.  The demon squealed and clutched its broken nose, before falling back over and expiring.

Blowing through all our collected XP to keep encounters at bay we legged it to the crystal shard and smashed it apart setting Wulfgar free and winning the game.

No healing surges left and about 4HP between us this was indeed a much closer session.

And for our final game we played Athrogate and Jarlaxle defending Mithril Hall against the invasion of Matron Baenre and her relentless armies.  This adventure uses the fixed cavern setup and is pretty cool, although you’ll have to fudge some of the encounter events.  For example, I drew a “draw a tile and place it, then put your hero on it” event which would have effectively taken me out of the game straight away.

Basically, running around smashing up fissures to collapse them, and then defending against the monsters coming through the open fissures is the order of the day here.  Whilst I as Jarlaxle was intent that we get the fissures closed as a priority, Athrogate wanted to fight stuff instead.  Which meant monsters kept emerging and keeping us back from our ultimate objective.  And when Lolth’s servant, that nasty Matron Mother arrived we were immediately put under enormous pressure having to deal with her, the encounters she potentially reveals, the monsters pouring through the fissures, and having to destroy the final two open fissures.

Athrogate’s morning star ‘Cracker’ led to an interesting rules situation as it inflicts a -4 AC on baddies.  So can you just keep doing this until you bring a Villain’s AC to zero?  We house-ruled, “no, that would be silly.”  But then I had the Dark Fire ability too, which also brings an enemy’s AC down by 4.  So could I use this in addition to Athrogate’s Cracker and bring the villain’s AC down by 8?  We house-ruled, “no, that would also be silly”.  So I used it on a water elemental instead.  The poor thing died soon after.

After much fighting, running and swearing, eventually Athrogate manged to close the final fissure and Jarlaxle nuked a bunch of underlings with a careful blast of the Lightning Wand.  Then it was just us and the Matron.  She chopped us down a couple of times and poisoned us both, so we spent a healing surge or two before bringing her to her knees and then bashing her skull in.  At that point it was game over, midnight, 3 victories under out belts, and an end to the evening.

Loads of fun and lots to enjoy in this game: cool tile effects, really thematic implementation of hero abilities and monster/villain skills and card and tile effects.  We both felt like there was more to do as the heroes, more options and decisions to make about how to use stances and powers.  Even some strategy about which tiles to move to, and some negating of kiting tactics by monsters who don’t care for kiting heroes (hello teleporting Drow Wizard).  But a huge leap in favour of the heroes in general I feel.  Clearly the designers wanted the Companions of the Hall to be kickarse, and it shows.  I really want to send Drizzt up against Strahd next and see how he fares.  But that adventure belongs to another day...


Thursday, October 20, 2011

Legend of Drizzt – Early Solo Impressions


Prelude:

The D&D Adventure System (Castle Ravenloft, Wrath of Ashardalon, Legend of Drizzt) provides a brilliant and fast dungeoneering ‘hit’ for those of us with no time or inclination to read and write and learn and play D&D anymore.  That it’s coop is just the icing on the cake because no one has to play the Morcar/Zargon/Overlord role and everyone gets to kick monster arse.  Though we’ve modded the hell out of this system and introduced campaign rules, events, new scenarios, heroes and monsters, etc I’m going back to basics for the purpose of this review so it’s just the game as it is.


What is it?

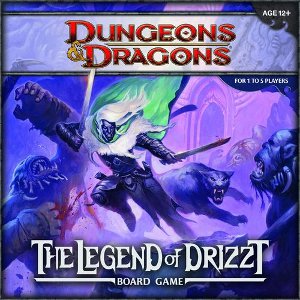
In case you tripped over and landed here without having read another thread before, Legend of Drizzt is a cooperative board game where you and your mates play fantasy heroes who go around bullying monsters, breaking into their homes, and killing all their friends and children before stealing all their stuff.  Ethically dubious, ridiculously fun.


How does it play?

Flip a tile, place a monster, have an encounter, take a hit, move your hero, roll a die, kill the monster, claim its XP, take a treasure, repeat, and either a) complain vociferously and then break out some meeples instead, or b) marvel in the beautiful simplicity of the unfolding story and delight in your hero’s progression through the adventure as the tension escalates into an epic showdown.


What are the bits like?

Ace.  Awesome minis, beautiful tiles (better than CR/WOA), the traps now have art on them too.  Tons of cards and tokens and a massive box to fit it all in.  Plus a massive demon that barely fits in the box too.  Make sure you use the hot/cold water treatment on any bent minis to get them back into shape in a jiffy.


What’s new to the D&D Adventure System?

Not much to be fair.  This is pretty much exactly the same game as Castle Ravenloft and Wrath of Ashardalon.  If you didn’t like either of those games for whatever reason, this is not going to correct any issues you had with them.  It’s more of the same but with different packaging.  If you liked the previous games then you’re in for a treat, because every card, power, mini, tile and token is brimming with fresh new goodness, new encounters, monsters, heroes, treasures, villains, basically everything.

Heroes.  In Legend of Drizzt the focus is on the Heroes and their powers, which make up most of the cards you get with the game.  Because the villains from RA Salvatore’s books are so popular you get to play a couple of them as heroes too.  So having Artemis fight alongside Drizzt is pretty sweet.  But the various adventures will also give you the opportunity to fight against Artemis (and Jarlaxle) as villains, which is also cool.

It’s fair to say that the Heroes in this set are considerably more powerful than the previous two games.  After playing the introductory solo adventure “Exile” with every new Hero once each I haven’t lost a game.  It only came close once with Wulfgar, when I accidentally shuffled the objective tile (the Surface tile) into the rest of the stack and only noticed when there were 13 new tiles in play (there should have been a max of 8), hordes of monsters and encounters going off, and no sign of the exit.  Even then when I corrected the error and placed the Surface exit, I still managed to fight my way out and win.

Drizzt, of course, is a total power house.  Attacking twice per turn instead of the usual one attack is tough enough, but he also has a Stance ability which allows him to move and attack in the villain phase.  Meaning any new 1HP monsters which appear are also likely to disappear in the same instance.  And having his pet panther Guen turn up to eat the bad guys helps too.  I finished the Exile adventure with him having lost only 3HP by the end.

Off the back of this I decided to take Drizzt solo into the first “2-5 Heroes” Adventure.  The goal is to find an item (the Crown) and then kill Artemis Entreri.  Drizzt was able to do this without having to spend one healing surge.  This could be an expected run of luck for the first couple of easier scenarios so we’ll see how it pans out when we’re going up against bosses like Errtu further down the line.

Like the previous games, where adventures say “2-5 Heroes” you can easily take in just 1 Hero for a greater challenge in solo play.  Add in an extra surge or two if you’re really struggling.


How is it better than CR/WOA?

Mini villains.  Trolls, Driders and a truly nasty teleporting Drow Wizard can turn up just from the monster deck.  So just when you’re enjoying a nice run of goblins and spiders, some big bastard will unexpectedly turn up and start pounding you into the floor.

Monster AI.  The monsters have a nice mix of tactics once again, drawing more from WOA than CR, so you have goblin archers who cower when adjacent, and trolls who regenerate, or spirits who lure your heroes in from afar.

Monster deck events.  These aren’t major, but there are a couple of sorely needed cards in the monster deck which mix things up and either give you a break altogether, or double the monster presence in the new tile.

Treasure deck balancing.  Fortunes are back, and they’re welcome!  Whilst mostly items, the LoD treasure deck gives you a number of fortunes too, which will heal heroes, restore powers, remove nasty encounters and similar.  Mix the three games’ treasure decks together now and you have a nice balance of items and fortunes.  So, not necessarily an improvement on the previous games, but I nice balanced mix.

Turbo Heroes!  This again?  Yes.  The Companions of the Hall are bringing mad skills with them.  Criticisms about the game are being answered in unusual ways it seems.  So people who complained about monsters always getting the jump on them can now play Catti-Brie or Drizzt, and start moving and/or acting during the villain phase with their new powers.  Whilst it’s not really changing the rules of the game (which I think some would prefer) the designers are still going out of their way to meet these player demands.  The new heroes play very differently from the previous games, and are more powerful.  Poor Kat the Rogue from CR will be suspicious by her absence, and not because she’s hiding in shadows.  You have loads of options with the cool new Stance powers to go offensive, defensive, healing, moving and generally mucking about with the usual turn order.  They’re pretty thematically integrated from the books’ characters too, considering it’s an otherwise fairly light game.

Tile effects.  This is one of my favourite touches, and something that came up a lot in previous discussions about the game.  Some tiles are narrow passages which reduce the AC of monsters and heroes on that tile, some have volcanic vents on them which can potentially damage heroes with a bad encounter card draw, some tiles have 1 square-wide areas to move through like the chasm and bridge.  Also the tile art is vastly improved too.  I never had a real problem with the previous games’ tile art but LoD has the best by far, the jigsaw sections now fit together ‘properly’ too because of the new design leaving no ‘black jutting into art’ bits.  The special tiles look great, and you get 3 extra big showdown tiles like the start tile.  These function kind of like the Chambers from WOA.

Competitive Adventures.  For those that want them.  It’s an extra dimension to the gameplay, but not the most successful for this ostensibly cooperative game (see below).


How is it worse than CR/WOA?

Easier?  Bear in mind that these are first impressions, but these new Heroes are hard as nails and leave the CR/WOA Heroes wanting.  Looking through the LoD villains and new scenarios there don’t appear to be any highly dangerous challenges for them either.  Even the Balrog - sorry Balor – is only a 5XP villain and doesn’t seem like he’ll put up too much of a fight.

Lack of Campaign play.  Whilst Wrath of Ashardalon offered progression from CR towards campaign play with the excellent Treasure Tokens rules and the linked adventures in the scenario book, LoD has disappointingly done away with this again.  Prices for Treasures are still included on the cards to provide backwards compatibility with WOA but that’s your lot.

Competitive Adventures.  These are a nice touch and I’ve seen variants leaning towards this kind of game play, so it’s a personal preference but these games shine in the cooperative scenarios and I don’t see the competitive adventures receiving as much replay value.  For competitive play you could easily break out plenty of other games in this genre and get the DM role going again instead.

Adventure Design Innovation.  Most of the new coop adventures are ‘find the boss and kill it’, which is fun enough, but it would have been nice to mix things up a bit more. 


If I only get one of the three games, which should it be?

Well, none of them are mutually exclusive and really you should be getting all three, preferably in the order that they were released.  But for me this is mainly a question of theme:

Are you a fan of crypts, undead, vampires and/or Ravenloft?  Castle Ravenloft.
Do you prefer the ‘classic’ D&D adventure archetypes of Heroes fighting orcs and dragons?  Wrath of Ashardalon.
Or are you mental for Drizzt and co and have all of RA Salvatore’s books?  Legend of Drizzt.

In terms of the game itself:

Castle Ravenloft gives you monster tokens, the most interesting quests and is potentially the most difficult of the three games.
Wrath of Ashardalon gives you campaign rules, big chambers for boss battles, doors, allies, more interesting monsters, and is marginally easier than CR.
Legend of Drizzt gives you super heroes, super villain/heroes, treasure chests, competitive adventures and big bloody trolls that can just show up from the monster deck, also seems the easiest of the three at first impression.


What has the Gears Of War board game got to do with anything?

It’s a space man game with space aliens and space guns set in space*.  Another cooperative minis game often compared to the D&D AS.  It allegedly has more devious AI because instead of drawing a card and getting a random monster from a choice of around 10 types you draw a card and get a random monster from a choice of 3 types.  But that monster will randomly attack you in different ways so you’ll need to spend the whole game hiding like a coward under every table or couch that your space man will see.

* Kind of.

Warhammer Quest?

Beautiful, aging game which is very fiddly, and plays much longer than the D&D Adventure System, and takes longer to set up and take down.  Also needs lots of pen and paper management.  WHQ has superb campaign rules which the D&D AS could learn from and simplify though.

Descent/HeroQuest/Advanced HeroQuest/D&D Adventure Game/Supero Dungeono Exploreo/Etc.

These games all require one of you to sit alone as a baddie and watch telly or read a book whilst you get shafted by the rest of your mates for the whole game.  Win and they’ll resent you, lose and they’ll respect you less.  Kidding of course (a bit), but they’re not fully cooperative games so don’t really do what the D&D AS does.

Is it any good?

Hell yeah - quit reading and get buying!  It’s so quick to set up and play through you find yourself hooked into more and more adventures and time just flies.  And the various community content on BGG is incredible, not to mention the support and new adventures from WOTC.

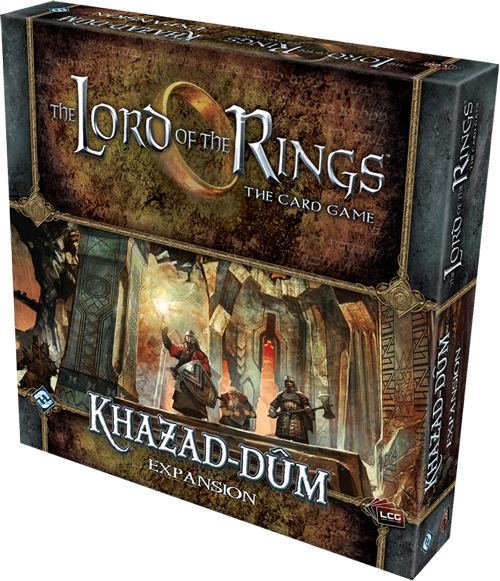
This is one of the best solo games in my collection and rivals LOTR:LCG in that respect.